Il modo più semplice per aggiungere la documentazione dell'API è utilizzare Swagger. Puoi configurarlo per generare una pagina di documentazione API e persino inviare richieste ai tuoi endpoint. Ecco come appare:
In questo articolo mostrerò come installare e configurare Swagger con le seguenti funzionalità (mostrate nell'immagine sopra):
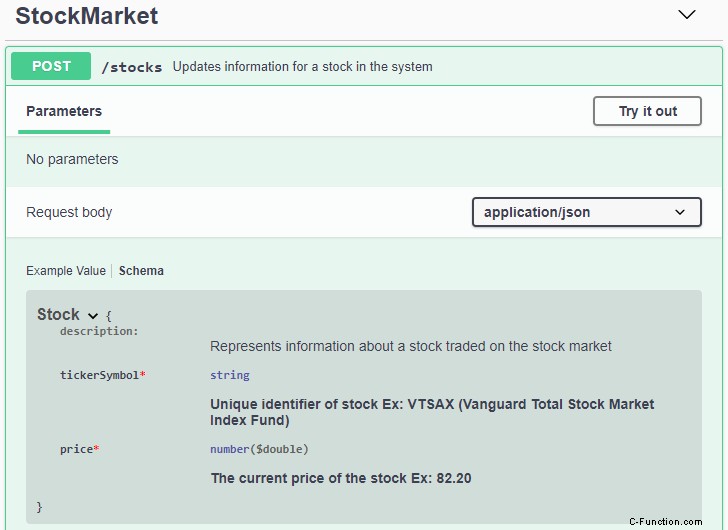
- Genera una pagina di documentazione dell'API.
- Visualizza i commenti XML per il controller e gli oggetti utilizzati nella richiesta (lo schema).
- Mostra i campi obbligatori.
1 – Installa il pacchetto nuget ASP.NET di Swagger
- Cerca il pacchetto Swashbuckle.AspNetCore
- Installalo

Questo installa i tre pacchetti di cui hai bisogno:
- Swashbuckle.AspNetCore.Swagger
- Swashbuckle.AspNetCore.SwaggerGen
- Swashbuckle.AspNetCore.SwaggerUI
2 – Aggiungi il servizio Swagger e il middleware in Avvio
Aggiungi Swagger in ConfigureServices(...) e Configure(...). Vedi le righe evidenziate nel codice qui sotto.
using Microsoft.AspNetCore.Builder;
using Microsoft.AspNetCore.Hosting;
using Microsoft.Extensions.Configuration;
using Microsoft.Extensions.DependencyInjection;
using Microsoft.Extensions.Hosting;
using System;
using System.IO;

namespace SimpleSwagger
{
    public class Startup
    {
        public Startup(IConfiguration configuration)
        {
            Configuration = configuration;
        }

        public IConfiguration Configuration { get; }

        public void ConfigureServices(IServiceCollection services)
        {
            //1 - Add Swagger service and include XML documentation
            services.AddSwaggerGen(c =>
            {
                var filePath = Path.Combine(AppContext.BaseDirectory, "SimpleSwagger.xml");
                c.IncludeXmlComments(filePath, includeControllerXmlComments: true);
            });

            services.AddControllers();
        }

        public void Configure(IApplicationBuilder app, IWebHostEnvironment env)
        {
            if (env.IsDevelopment())
            {
                app.UseDeveloperExceptionPage();
            }

            //2 - Enable Swagger middleware
            app.UseSwagger();
            app.UseSwaggerUI(c =>
            {
                c.SwaggerEndpoint("/swagger/v1/swagger.json", "My API v1");
            });

            app.UseHttpsRedirection();

            app.UseRouting();

            app.UseAuthorization();

            app.UseEndpoints(endpoints =>
            {
                endpoints.MapControllers();
            });
        }
    }
}

Code language: C# (cs)
3 – Configuralo per avviare la pagina del documento dell'API Swagger
In /Properties/launchSettings.json, imposta launchUrl su "spavalda".
{
  "$schema": "http://json.schemastore.org/launchsettings.json",
  "iisSettings": {
    "windowsAuthentication": false,
    "anonymousAuthentication": true,
    "iisExpress": {
      "applicationUrl": "http://localhost:39257",
      "sslPort": 44379
    }
  },
  "profiles": {
    "IIS Express": {
      "commandName": "IISExpress",
      "launchBrowser": true,
      "launchUrl": "swagger",
      "environmentVariables": {
        "ASPNETCORE_ENVIRONMENT": "Development"
      }
    },
    "SimpleSwagger": {
      "commandName": "Project",
      "launchBrowser": true,
      "launchUrl": "swagger",
      "applicationUrl": "https://localhost:5001;http://localhost:5000",
      "environmentVariables": {
        "ASPNETCORE_ENVIRONMENT": "Development"
      }
    }
  }
}

Code language: JSON / JSON with Comments (json)
4 – Genera automaticamente documentazione XML dai commenti XML
Per fare in modo che Swagger mostri i commenti XML devi fare in modo che il tuo progetto produca un file di documentazione XML.
Nel progetto Build properties, metti un segno di spunta su file di documentazione XML.

5 – Aggiungi commenti XML e l'attributo [Obbligatorio]
Ecco la classe StockMarketController e Stock. Ho inserito commenti XML – ///
using Microsoft.AspNetCore.Mvc;
using System.ComponentModel.DataAnnotations;

namespace SimpleSwagger.Controllers
{
    [ApiController]
    [Route("stocks")]
    public class StockMarketController : ControllerBase
    {

        /// <summary>
        /// Updates information for a stock in the system
        /// </summary>
        /// <param name="stock"></param>
        /// <returns></returns>
        [HttpPost]
        public IActionResult UpdateStock([FromBody]Stock stock)
        {
            //update the stock data in the system
            return Ok();
        }
    }

    /// <summary>
    /// Test
    /// </summary>
    public class Stock
    {
        /// <summary>
        /// Unique identifier of stock
        /// Ex: VTSAX (Vanguard Total Stock Market Index Fund)
        /// </summary>
        [Required]
        public string TickerSymbol { get; set; }
        /// <summary>
        /// The current price of the stock
        /// Ex: 82.20
        /// </summary>
        [Required]
        public decimal Price { get; set; }
    }
}

Code language: C# (cs)
6 – Avvia la tua API web e invia una richiesta tramite [Prova] di Swagger
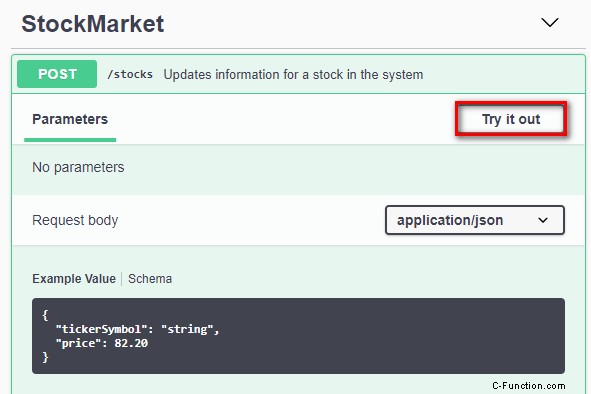
- Avvia il tuo progetto (Inizia senza eseguire il debug – Ctrl+F5). Verrà avviata la pagina del documento Swagger nel browser.
- Fai clic su Prova
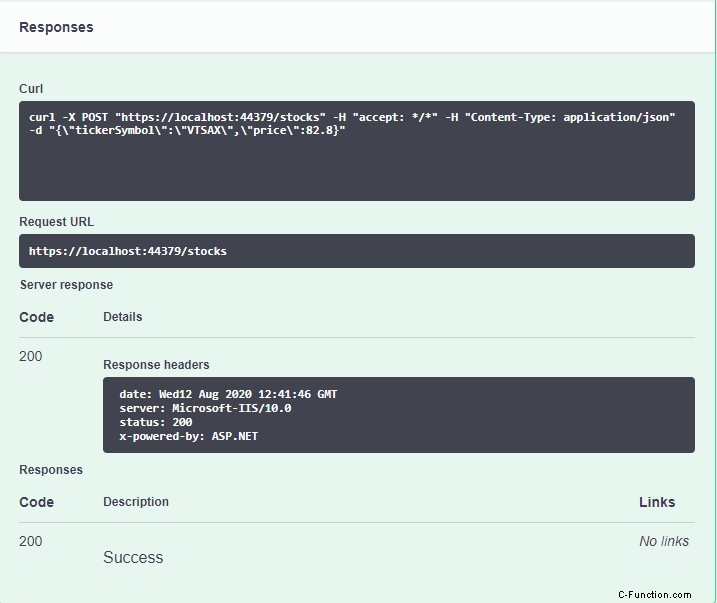
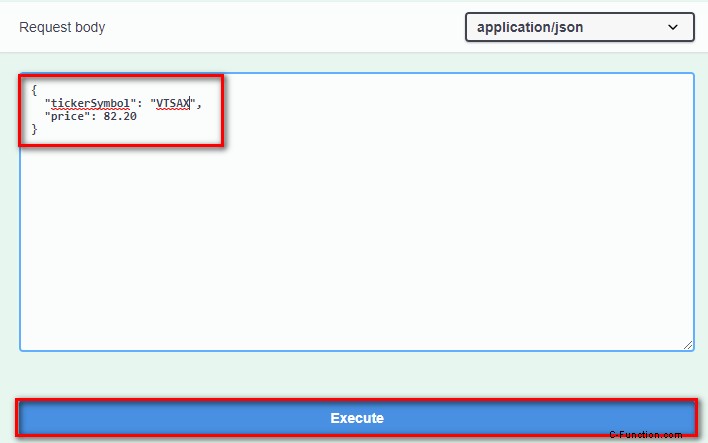
- Compila il JSON del corpo della richiesta, quindi fai clic su Esegui.
- Guarda la risposta.